Choosing the Right Flange Surface Finish. an Overview of ASME, ESF and FSA Guidelines
September 7, 2016
1
The flange surface finish for the sealing area is commonly represented by the symbol Ra. Irregularities in the surface can impact upon the effectiveness of the gasket’s ability to close potential leak paths and the friction values needed to keep the gasket in position.
Those new to this field of engineering are liable to incorrectly assume that a smoother finish will provide a better seal. But this isn’t necessarily the case. This subject has been debated over many years and the optimum flange surface finish really depends upon each individual application.
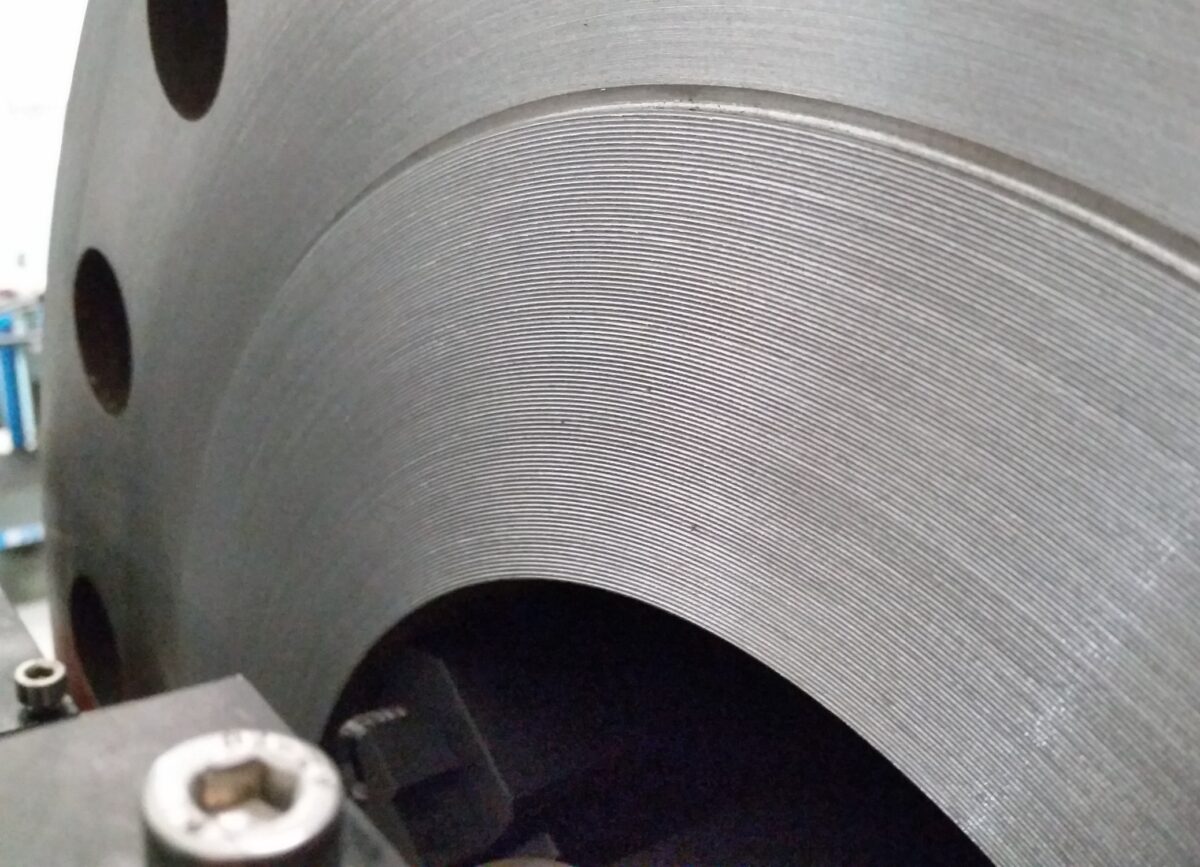
Smooth versus phonographic finish. Which is right for your flange joint?
As a general rule, the ESA and FSA suggest that for high temperature and /or pressure applications, a rough (but controlled) surface finish is recommended, using gaskets with high resistance to flow. Smooth surfaces on the flange faces should be used for low temperature and/or low pressure work, typically with soft gaskets. Serrated and phonographic finishes are often associated with pipe flange assemblies, whereas commercial ground finishes are likely to be found in flanged joints other than pipe flange assemblies.
In ‘Guidelines for Safe Seal Usage’ (publication number 009/98) the ESA /FSA also state these general rules applicable to the flange surface finish:
- A minimum seating pressure must be achieved in order to make the gasket material flow into the flange surface irregularities. The total force required to make this occur is proportional to the contact area of the gasket and the flange. Bolting force may be lowered by reducing the gasket area or the flange contact area.
- The closer together are the ridge surfaces of a concentric serrated finish and the shallower are the grooves (the Ra), the more the flange area begins to resemble a smooth face flange, and hence there is more contact area. Higher bolt loading is therefore required in order to seat the gasket. The opposite effect occurs as the ridge spans become wider.
- In the limit, with a very smooth flange there will be reduced friction restraining the gasket from extruding outwards under the influence of the internal pressure of the retained medium.
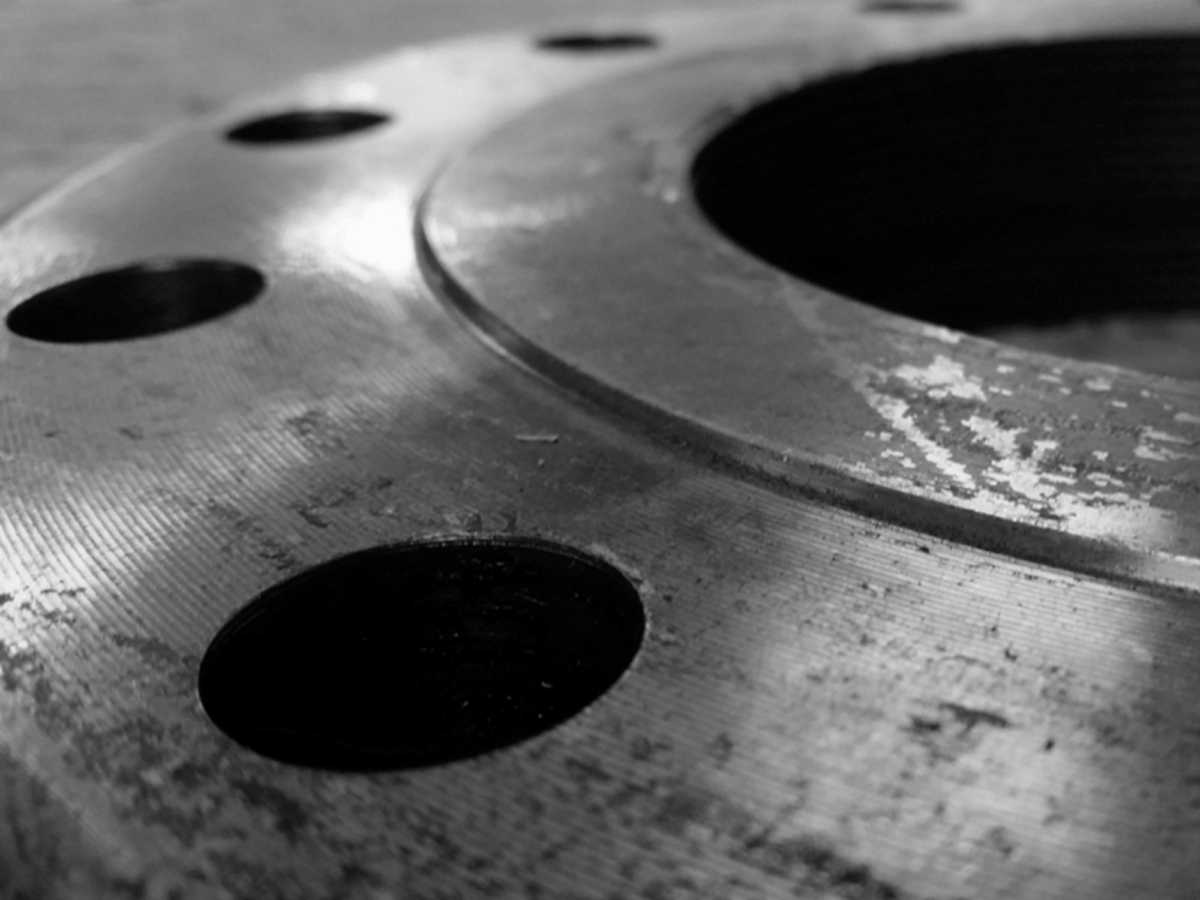
- A phonographic finish is more difficult to seal than a concentric serrated finish. Complete flow of gasket material must reach to the bottom of the ‘valley” surface in a phonographic finish to avoid a spiral leak path from one end of the spiral to the outside.
- Serrated and phonographic finishes are often associated with pipe flange assemblies, whereas commercial ground finishes are likely to be found in flanged joints other than pipe flange assemblies. Take care with milled finishes, which may create additional leak paths if the milling action is not sufficiently smooth El Since gasket materials vary in hardness or resistance to flow, selection of the proper gasket material is important with regard to the flange finish and application
How is flange surface finish measured?
Ra is a measurement of surface roughness and is the average of the absolute value of profile heights over a given length (area).

ASME B16.5 (2003) Standard
According to the American Society of Mechanical Engineers (ASME) “The finish of the gasket contact faces shall be judged by visual comparison with Ra standards (see ASME B46.1) and not by instruments having stylus tracers and electronic amplification.”
Standards on finish roughness by flange joint type
Tongue and Groove and Small Male and Female: The gasket contact surface finish shall not exceed 3.2 µ.m (125 µ.in.) roughness.
Ring Joint: The side wall surface finish of the gasket groove shall not exceed 1.6 µ.m (63 µ.in.) roughness.
Other Flange Facings: Either a serrated concentric or serrated spiral finish having a resultant surface finish from 3.2 to 6.3 µ.m (125 to 250 µ.in.) average roughness shall be furnished. The cutting tool employed should have an approximate 1.5 mm (0.06 in.) or larger radius, and there should be from 1.8 grooves/mm through 2.2 grooves/mm (45 grooves/in. through 55 grooves/in.).
What ASME says about flange facing finish imperfections
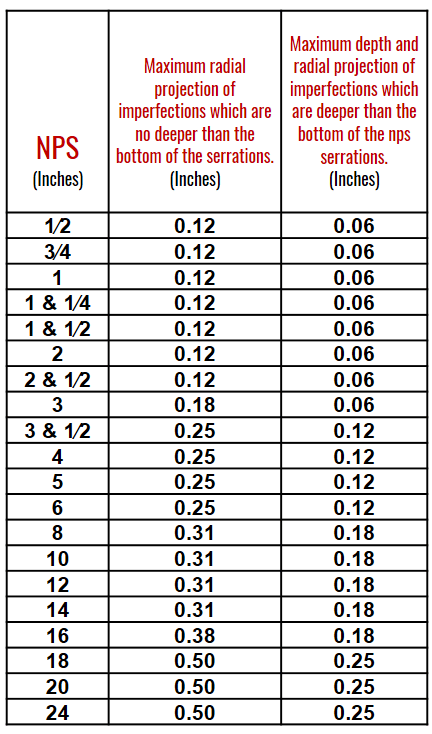
- According to ASME, the imperfections in the flange facing finish shall not exceed the dimensions shown in table below.
- A distance of at least four times the maximum radial projection shall separate adjacent imperfections.
- A radial projection shall be measured by the difference between an outer radius and an inner radius encompassing the imperfection where the radii are struck from the centreline of the bore. Imperfections less than half the depth of the serrations shall not be considered cause for rejection.
- Protrusions above the serrations are not permitted.
Permissible imperfections in flange facing finish for raised face and large male and female flanges
How to machine a damaged flange face
If you require a flange facing machine, there are many available to either purchase or hire, with OD and ID mounting options available and the capacity to machine flanges up to 120” diameter.
To discuss your next project get in touch with a technical contact for your region here

Decommissioning Case Study Pack
Learn how portable machine tools solved four tough decommissioning challenges
Discussion
Comments are closed.